Overview
Microsoft Azure Virtual Machine (VM) provides flexibility of virtualization for various computing solutions with Windows server, Linux, SQL Server and many more. From the Microsoft Azure portal, we can set up an individual virtual machine or a farm of various virtual machines in an easy and quick way.
In this article, we will explore what a public IP address brings to the virtual machine, how we can assign a static public IP address during creation of a VM, and how it works on an existing VM.
Public IP for Azure VM
Microsoft Azure by default has a dynamic assignment of a public IP address to a newly-created VM unless we change it to be static. Public IP enables communication to Azure VM from the internet. Assigning a static public IP address ensures that the address never changes as opposed to the dynamic public IP address.
The dynamic IP address changes every time we restart the Azure VM. Generally, observed pitfalls of this are as below.
- On every restart of the virtual machine, we have to download the new remote desktop file (.rdp) to connect to it.
- A few applications are configured to be run on a specific IP address or a range of IP addresses. The Dynamic IP address might not work well in these scenarios.
Assign Static Public IP address to VM during the creation
Microsoft Azure portal provides an easy way to create a virtual machine. The wizard to set up a new machine gathers the information about the virtual machine to be created. The information includes basic things (name, region, image, size, credentials), disks, networking, management, guest configuration, tags, etc. The networking information includes the IP address configuration, which by default is dynamic. Follow the below steps to set up a static public IP address.
- Login to MS Azure portal
- Click “Virtual Machines” from the left menu.
- Click “Add”.
- Add the basic information about the virtual machine to be set up.
- In the Networking tab, for Public IP click “Create new”.
- Under assign, select Static.
- Click OK.

Add Static Public IP to an existing Azure VM
A public IP address can be set on existing virtual machines by following the below steps.
- Login to MS Azure portal
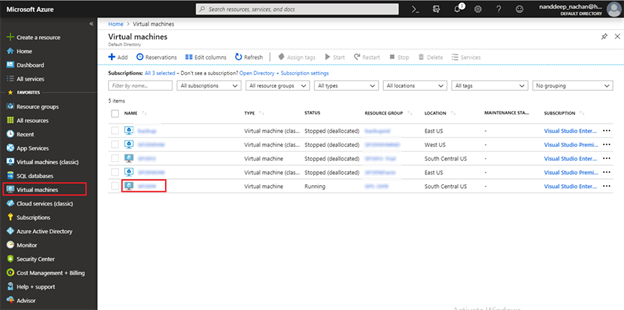
- Click “Virtual Machines” from the left menu.
- Select an existing virtual machine from the list.

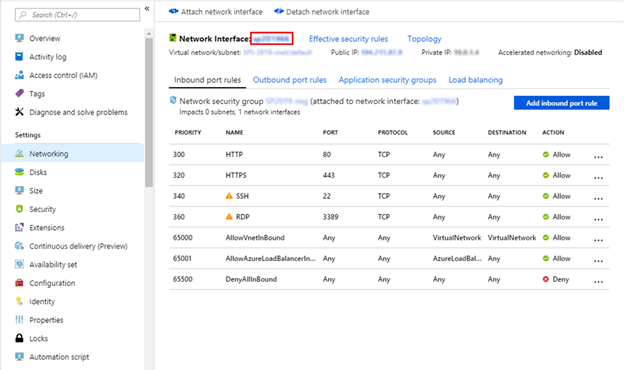
- Under Settings, click “Networking”.
- Click “Network Interface”.

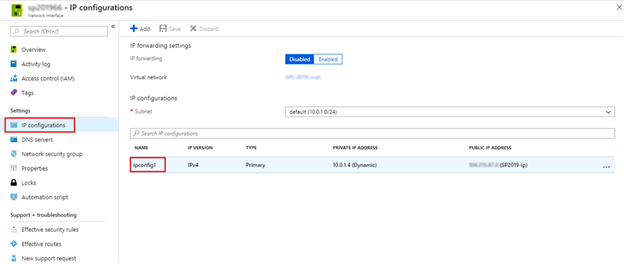
- Under Settings, click “IP Configurations”.

- Click IP configuration (e.g. ipconfig1).
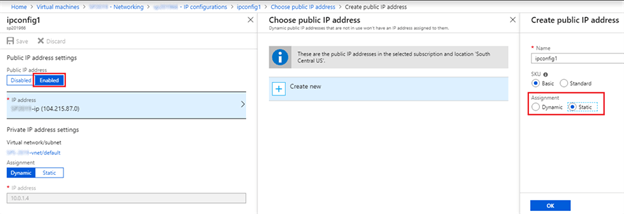
- Under Public IP address settings, for Public IP address click Enabled.
- Click “IP address”.
- Click “Create New”.
- Under Assignment, select Static.

- Click OK.
- Click Save to save the changes to the network interface.
Summary
A public IP enables communication to Azure VM from the internet. Assigning a static public IP address ensures that the address never changes. Public IP can be assigned to a virtual machine during creation or afterward.